Passive buzzer
With Arduino you can do a lot of interactive work, the most commonly used are displays, sound and light shows. Passive buzzer module KY-006 is used in this experiments, we let the experiment circuit sound.
Buzzer and the principle
The introduction of the buzzer
Buzzer are used in electronic transducers, DC voltage power supply, wide use in computers for error sounds, printers, copiers, alarms, electronic toys, automotive electronic equipment, telephones, timers, etc.
The classification is divided into buzzer piezo buzzer and two types of electromagnetic buzzer.
Graphic symbols for buzzer circuit in the circuit is demoted by the letter “H” or “HA” (old standard with “FM”, “LB”, “JD”, etc.)
How piezo buzzer works ?
Piezo buzzer is an electronic device commonly used to produce sound. Light weight, simple construction and low price make it usable in various applications like car/truck reversing indicator, computers, call bells etc. Piezo buzzer is based on the inverse principle of piezo electricity discovered in 1880 by Jacques and Pierre Curie. It is the phenomena of generating electricity when mechanical pressure is applied to certain materials and the vice versa is also true. Such materials are called piezo electric materials. Piezo electric materials are either naturally available or manmade. Piezoceramic is class of manmade material, which poses piezo electric effect and is widely used to make disc, the heart of piezo buzzer. When subjected to an alternating electric field they stretch or compress, in accordance with the frequency of the signal thereby producing sound.
Active and passive buzzer buzzer What is the difference
Passive Buzzer:
Here the “source” does not mean power. But rather refers to the shock source (Frequency). In other words, the active internal buzzer with shock source. The passive internal sources without shocks, so if a DC signal can not make it tweet. Must 2K ~ 5K square wave to Drive it. Passive buzzer are cheap as they don’t have oscillator circuit. Sound frequency control is possible.
Active Buzzer:
Active Buzzer comes with internal oscillator circuit. Sound frequency is fixed.
Arduino Connections with Piezo Buzzer Module
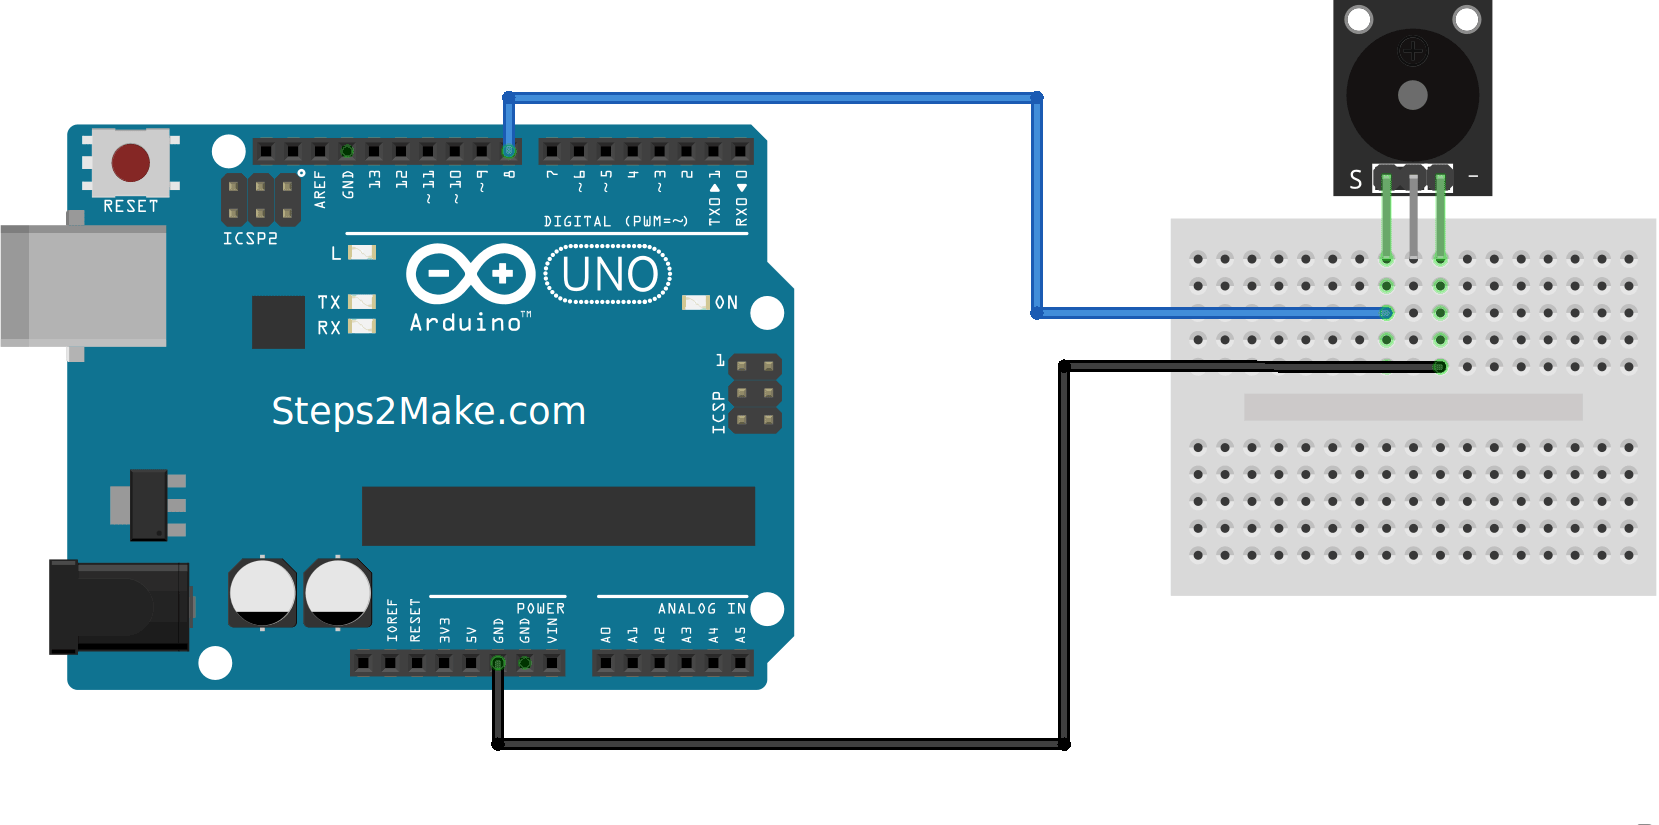
Connect signal (S) to pin 8 on the Arduino and ground (-) to GND. The middle pin is not used.
Arduino Program for Beep Sound with Passive Buzzer
//Example Code for KY-006
//Steps2Make.com

int buzzer = 8 ;// buzzer signal connected to this pin
void setup ()
{
  pinMode (buzzer, OUTPUT) ;// set the digital IO pin mode, OUTPUT out of Wen
}

void loop ()
{
  unsigned char i, j ;// define variables
  while (1)
  {
    for (i = 0; i <80; i++) // Wen a frequency sound
    {
      digitalWrite (buzzer, HIGH) ;// send voice
      delay (1) ;// Delay 1ms
      digitalWrite (buzzer, LOW) ;// do not send voice
      delay (1) ;// delay ms
    }
    for (i = 0; i <100; i++) // Another frequency sound
    {
      digitalWrite (buzzer, HIGH) ;// send voice
      delay (2) ;// delay 2ms
      digitalWrite (buzzer, LOW) ;// do not send voice
      delay (2) ;// delay 2ms
    }
  }
}
Program have two for loops with different frequency generations. You can see the delay makes change in frequency.
Try different delays to see change in beep sound.
Disadvantage of using passive buzzer in Arduino, is your program is stuck in loop until you are generating sound.


Responses